| Resources | Blog | Articles | Booking Demo | Forum | Help Pages | How-To Videos | Webinars | |||||||||
| Resources: Articles |  |
|
 How to Set an SPF Record for a Domain Registered with GoDaddy
| Sep, 23, 2014, by member Cindy Amato |
Follow the 11 steps below to add an SPF record for your domain registered with GoDaddy. This will help to prevent your booking-related emails that are sent from Bookerville from going into guests’ junk email box or being marked as spam.
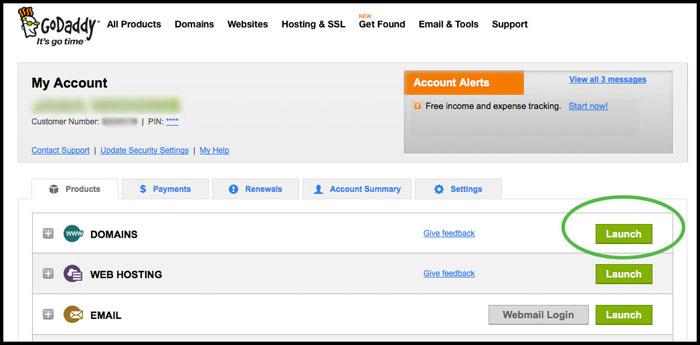
Step 1: Sign in to GoDaddy.com. This will take you to the My Account screen.
Step 2: From the My Account screen, click the Launch button on the right side of the screen in the Domains row (first row).
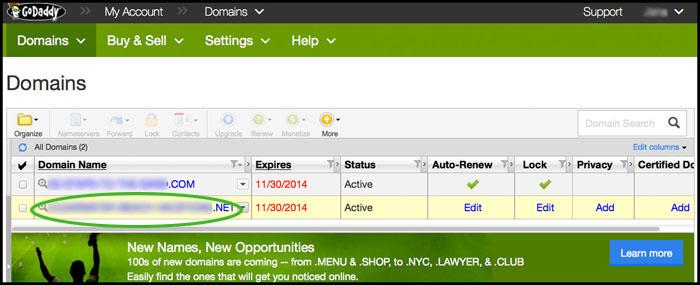
Step 3: On the Domain screen, click the domain name you want to edit.
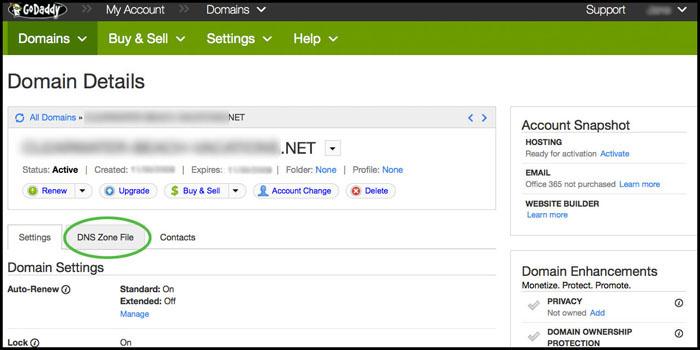
Step 4: On the Domain Details screen, click the second tab called DNS Zone File.
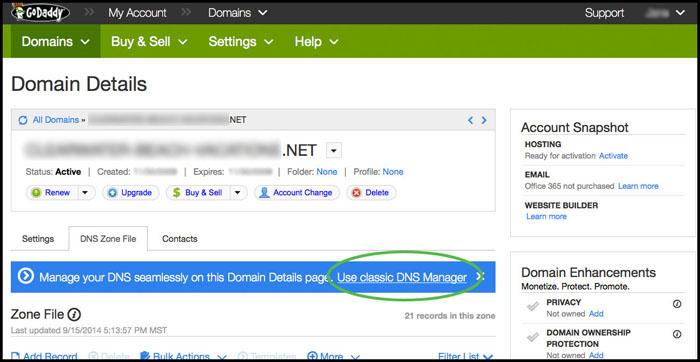
Step 5: On the DNS Zone File Tab, click the Use Classic DNS Manager link.
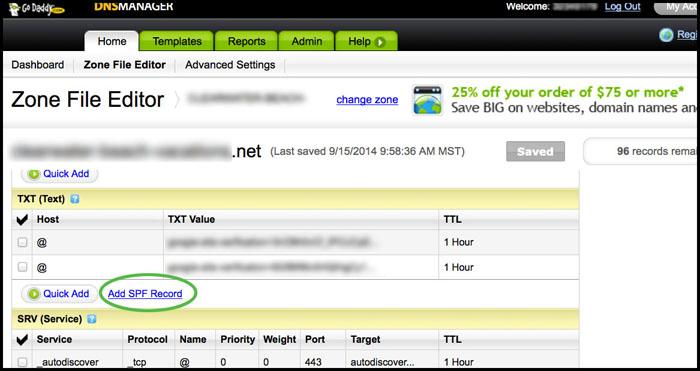
Step 6: On the Zone File Editor screen, scroll down and look for the TXT (Text) section. In this section, click the Add SPF Record link.
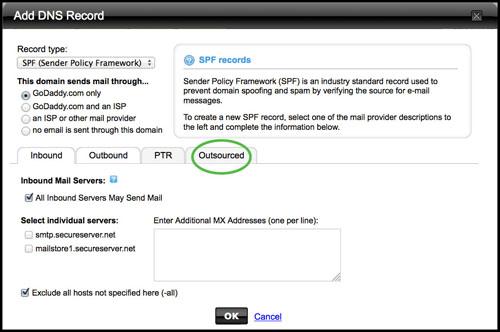
Step 7: On the Add DNS Record pop-up window, click on the Outsourced Tab.
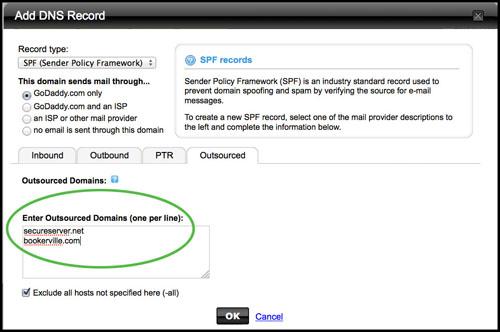
Step 8: In the Enter Outsourced Domains text area, enter the following text*: bookerville.com
*If there are other lines of text in this box already, that’s okay. Just begin typing on the next line.
Step 9: After you have entered the text, click the OK button.
At this point, you will get a Confirmation notice that says, “You are about to modify your existing zone file.” Click the OK button.
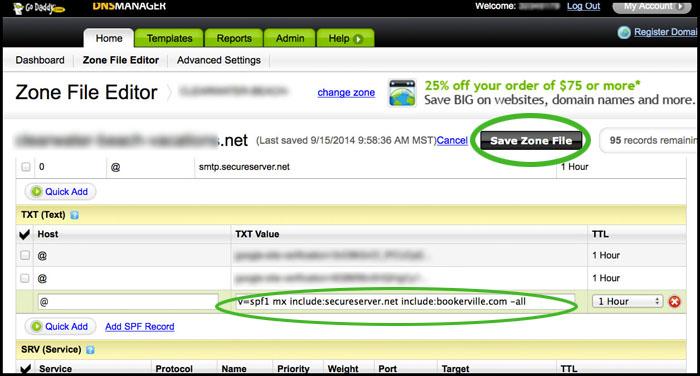
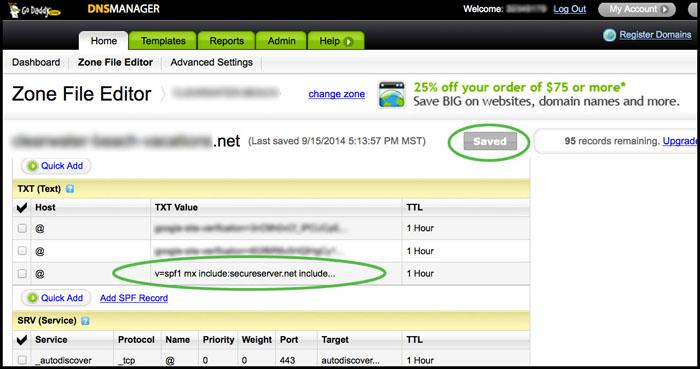
Step 10: On the Zone File Editor screen, you should see a new line in the TXT (Text) section.
At this point, you are almost done. At the top of the Zone File Editor screen, click the Save Zone File button for the changes to take affect.
Step 11: You will get a second notice that says, “It will take about one hour for the changes to take affect.” It may take longer (up to 48 hours, they say) so wait at least two days to make sure it’s working.
Your saved zone file will look like this.
You are all done. Please let us know if you have any questions.
PS: If you'd like more information from GoDaddy on this topic, go here: GoDaddy Help Article: Managing DNS for Your Domain Names
See All Articles...


